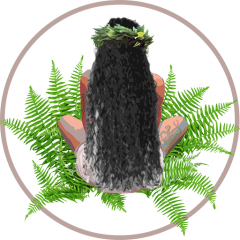
I’ve finally decided to do another CG method post! I will continue where I left off on Part II and talk about how my hair has been lately here in the Pacific NorthWest…
For all your curly girls (or wavy) who have made the brave decision to transition into this new lifestyle since I’ve started this series, welcome to our ʻohana! It’s different and it is hard to stand by (especially when you are first beginning), but it is so worth it. Keep on going!
Clarifying
Although I mentioned in part II that co-washing can efficiently remove the day-to-day grime (when all silicones are removed from your routine), sometimes it is a good idea to clarify your hair. This process removes a lot of build-up and some people do it once a week or even once a month, it would strictly depend on your hair and it likes. There are CG-friendly clarifying shampoos or you could make your own. If you hair seems less shiny or increasingly dry, you may need to clarify. The shampoo I use for clarification is Shea Moisture’s Sachi Inchi Oil Omega 3,6,9 Rescue + Repair Clarifying Shampoo (that’s a mouthful haha). It looks like this:
However, if you would rather make your own or it’s too expensive, you could just do an Apple Cider Vinegar rinse (or ACV rinse). Now this rinse is not only used for clarifying… which means I will make it it’s own topic.
ACV Rinsing
Apple Cider Vinegar rinsing is amazing (if you can get past the smell, it is also much cheaper than buying $8-13 bottles of clarifying shampoo). Personally, the smell doesn’t bother me. I’m Filipino and we cook with a lot of vinegar, haha. Doing an ACV rinse will clarify your hair and remove excess amounts of build up on your strands (co-washing is efficient to pretty much remove build up from the scalp). All you need to do is mix one part ACV to three parts water. Pour it on your scalp (close your eyes tight!) and onto your strands, then rub your scalp as if you were co-washing and your strands as if you were shampooing. Rinse it all out thoroughly and co-wash or shampoo vigorously to remove traces of the ACV scent. I have once rushed through this process and left the house smelling like my hair products and a hint of vinegar… it wasn’t pretty. So there’s your clarifying process! However! You can also do an ACV rinse if your scalp is very oily and your head is flaking a lot, which leads me to the next topic.
Dry Scalp/Flaking
Ever since I started the CG method, my scalp has never stopped flaking. I know this may put you off, but the method works believe it or not. I have seen way too many testaments and my own hair has gotten much curlier. I haven’t seen the doctor yet, but I am possibly thinking that I have scalp psoriasis, which is why my scalp hasn’t stopped flaking. Some days are really bad, and some days are pretty average. However, I have done a lot of research and it is also very normal to be flaking quite a bit during the transitioning process. Transitioning is the hardest part for most people and to alleviate that flaking and dry scalp, an ACV rinse or a sugar scrub would help tremendously. A sugar scrub is not hard to make at all and what this process does is put moisture back into your scalp and roots as well as get majority of the flakes out. The CG peeps would highly recommend (so do I) using raw sugar because it would scrub easier, rather than finely granulated sugar. I use raw brown sugar mixed in a bowl with my normal CG-friendly conditioner (a thick one is best). Do not let it sit because the sugar will dissolve, it’s probably best to mix it in right before you step into the shower. Use this scrub first, and be a little gentle, you would want your scalp to get raw. Rinse thoroughly and continue with your usual routine. For those struggling with the flakes and dryness, I hope this helps you! Remember, there is a difference between dandruff and just flaking. Dandruff is usually caused by buildup of products, so you probably aren’t scrubbing your scalp good enough (and it usually looks yellow-is).
Hair Porosity
Hair porosity is a big one. If nothing seems to be working for you (I mean the process of transitioning is just absolutely horrible) maybe you should look into what kind of hair porosity you have. I’m still not entirely sure what my own hair porosity is, but I am thinking it leans into lo-po (AKA low porosity). You could even have multiple types of porosity in your hair! It gets complicated. The basics of porosity is that your hair can either soak up product quickly, or it may need some coaxing first. Here’s a diagram that would help you understand what I mean:
There are three types of porosity on a hair strand. Basically, under a microscope hair would look like this. The hair shaft can be easily penetrated by moisture but also can easily lose moisture if your porosity is high. If your hair porosity is low, it could mean that your hair takes longer to get wet in the shower and it really takes time to get it to a good slip when conditioning. The pros of lo-po hair means that your hair (if done right during a wash) can potentially retain moisture longer. However, you would need to work really hard to get the moisture in. If you wanted to do a strand test, wash your hair and refrain from putting any product in. Get a strand of hair that is already loose or has fallen out in the washing process (that’s easier than not using any products and then finding a loose strand on your head). When it is completely dry place it in a clear cup of water. Make sure the hair is coated by the water but do not push it down. Leave it alone and come back a few hours later. If the hair is floating at the top still you have lo-po hair (the hair cuticles aren’t open enough to be filled with water), if it floats in the middle, then you have medium porosity hair which is sorta the best kind of porosity where it’s not too hard to put moisture in, and it won’t dry out too quickly. If your hair strand sunk to the bottom of the cup, then you have high-po hair; it can get moisture quick but it will lose moisture just as quickly. Now, knowing this about you hair is not too important during the transition process, but after 6+ months, it can really affect the way you wash/co-wash. You may want to try new methods, like the super-soaker, the squish to condish, shingling, etc. I can talk about these in another post!
So, if you have read other posts not just about the CG method, but about my life right now, you know I now live in the Pacific North West! The humidity is way lower than in Hawaiʻi, and my hair is extra beautiful here, however, my scalp is drying out even more than usual. I have been using CG-friendly oils more often to try and save my scalp. I had this oil while I was in Hawaiʻi, but I used it sparingly (mostly because it feels nice and cool on my scalp) and now I use it every day. Its the Curls Blueberry & Mint Tea Scalp Treatment. It also helps with actual flaking and encourages growth when massaged in. After I shower and get dressed I work on putting products into my hair. The first product I put in is the oil. By the way it feels amazing and it helps with itching. I distribute it straight onto my scalp with the dropper and I gently massage it in (my hair is still wet) and then I move onto the next step. It helps a lot, and maybe it will help you too! The bottle can be a little pricey but a little goes a long way and it has lasted for a while.
Itʻs available at your local store and Amazon even has it! I love this stuff and I couldnʻt do it it here, if I had not brought it along with me.
I hope you enjoyed part III of this series! And I hope you are persisting with the lengthy process.
Happy Curl, Happy Girl
Signing off,
Curly Island Girl
